Setting up Wireless Printers at home – WPS connection guide
A common procedure to connect is:
Step 1. Push WPS button on printer
Step 2. Within 90 seconds push WPS button on the Router.
Step 3. Download device software from the official website of the device:
HP printer – 123.hp.com
Canon printer – https://www.canon.co.nz/support
Brother printer – https://www.brother.co.nz/customer-help/how-to/install-printer-driver-software
Step 3 (alternative). Find printer on the computer using Setup Printer dialog Windows 8/10 (by pressing start button or using search and typing “printer”)

How to find WPS buttons:
WPS button helps to connect the Printer to the Router.
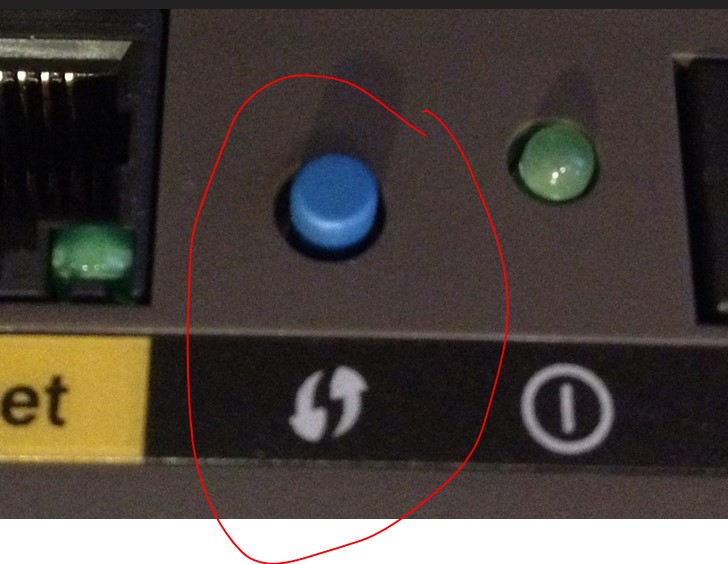
WPS on the router may look like:
- Solid button with WPS label or circle arrows
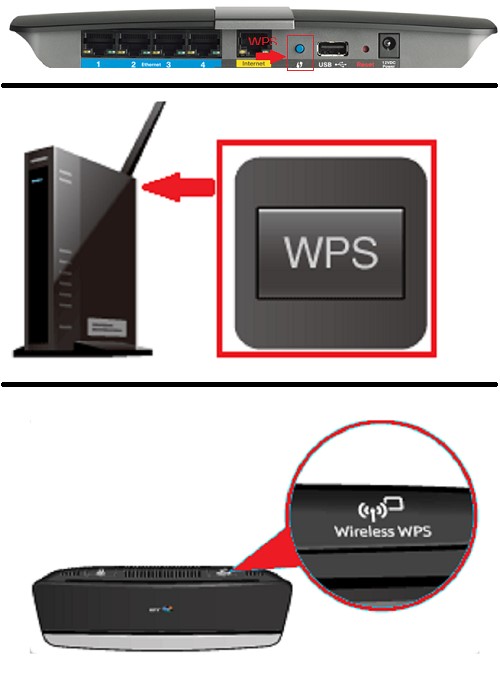
WPS on printer:
- is also a solid physical button with WPS logo (or arrows)
- or you will need to scroll down the printer menu to find the WPS connect
HP Printer – Example of connecting via WPS
- Make sure your router has a WPSbutton or a button with the WPS icon .
- If the router has a WPS button, do not press the button yet. Continue to the next step.
- If the router does not have a WPS button, skip to the frequently asked questions in this document for options.
- Place the printer within range of the Wi-Fi router signal.
- Put the printer in WPS connection mode.
- Printers with a touchscreen control panel: Open the Setup, Network, or Wirelesssettings menu, select Wi-Fi Protected Setup, select Push Button, and then select Start.
- Printers without a touchscreen control panel: Press and hold the Wireless button for five seconds until the wireless light flashes. For Tango printers, press and hold the Wireless button and the Power button on the rear of the printer for five seconds until the blue bar flashes.
- Within two minutes, press and hold the WPSbutton on the router for three to five seconds, or until the connection process begins.
- Return to the printer and check the status of the wireless light or bar.
- If the light or blue bar stops flashing, the printer successfully connected to the network. Continue to the next step.
- If the light is still flashing or turned off, the connection failed. Move the printer closer to the router, and then repeat these steps. If the connection still fails, continue to the frequently asked questions in this document.
- Make sure your computer or mobile device is on the same local wireless network you connected the printer to.
- Go to hp.comand follow the instructions to install the software and set up the wireless connection